
Liam De Bolla
3D Character Animator
Production Work
Interview Blues Script
From my FMP idea, I needed a script as my piece will include dialogue. I decided to research script writing as well as downloading an Office template of a script.


From my first tutorial with my tutor, we decided to shorten and change to story meaning this script would have to be redesigned.
Take Note Script
As I changed the story of this animation slightly, I decided to give it a new name of 'Take Note'. This script will allow me to have a 15-30 second animation.


Testing Poses
Once I had my research, I created reference from possible poses that can show my character is nervous and shocked. From this, I chose four images to try and recreate in Maya using the Malcolm rig, which will be the rig in the animation. From this, I can use it as a reference in tutorials to explain my story as well as experiment with what the rig can do when it comes to recreating these poses.


Scared Animation Test
From the tutorials I watched on AnimDojo, I produced a quick test to experiment with some workflows. I used a cube to work on the timing, worked in spline to see the timing develop on the character, and use the layering tool for objects more. The cube was the timing of the main body and I used that alongside the reference to produce the animation. I could then reference the cube as it was a layer and hide it for playblasting. Working in splined tangents, I worked on the key poses, breakdowns, and finally the polish. I also wanted to add some story to the animation by providing a reason for the character to jump.
Reference
Working on Timing

Key Poses
Breakdowns
Polishing
Testing out story elements
This workflow was helpful to get a better understanding of the motion of the main body. From this, I was able to exaggerate parts of the jump compared to the blocked-out square taken of the timing for the reference. As said in the tutorial in AnimDojo, this workflow is helpful for more of body mechanic shots rather than performance. For my FMP project, I will not apply this workflow as it was recommended not to with performance pieces. My next test will be with a creature performance, experimenting with the creature workflow I learnt on AnimDojo.
Take Note Reference
I recorded the reference while producing several takes to find which take would be the best to use for my animation. From each take, there were different areas such as the way I pick up the pen, facial expression, and body movement that I liked more in a variety of takes. From this, I chose the best takes and put edited them to the audio file. The take I used for the reference, the interviewee character does not show the audience the pen quick enough and the facial expression is not too shocking compared to some of the other takes I did.
This is the video I will use as my reference as well as send to Claire for an idea of how the animation will look and how the assets she needs to rig will be positioned in my story.
When using Premiere Pro to edit these clips, the video was in 29.97 fps. I knew that I needed it to be in 24 fps for it to be used in Maya and for the animation to be at the right pace. I found that when I exported, there were horizontal lines in my video that would not be good for reference. I researched how to find a solution and this video helped me correct this issue and have the reference ready for animating.
https://www.youtube.com/watch?v=Pscs_AvpNQA
From the tutorial, we thought adding another shot of the boss would be best, so I recorded the reference of the second part of the script read to add to the reference. I did two takes and decided to use one of them for the reference as I felt that the one I chose fitted the motion and facial expressions to the voice over best.
This is now my updated reference for the 'Take Note' animation.
Creature Animation Test
I watched a video on Leopards and found one part of the video that showed a Leopard climbing a tree. I felt I should try animating that as it would show weight from the jump, as well as follow-through as the Leopard stops on parts of the tree.
https://www.youtube.com/watch?v=ZVDgr4CquDY
Once I used my technique of applying the reference to a cube in Maya, I found a new technique when it comes to camera movement. I found that if I position the cube with the texture of the reference in front of the camera and parent constraint it to the camera, I can move the camera with the reference tracking the movement of the camera. From this, I was able to follow the camera movement from the reference and apply it in Maya. The cube with the reference on it could then have its transparency adjusted so I can see my rig and the reference at the same time. I modelled the tree to resemble the tree in the reference and started working on the camera movement of the animation.
From this, I tested out the workflow I researched on AnimDojo and started working on the body and the head. Once that was done, I worked on the back legs, then the front legs, and finally the tail.
Camera Movement
Transparent Reference
Body
Back Legs
Front Legs
Tail
Polish
I was happy with this outcome due to the preparations I had with this test such as working on the camera movement before animating and working from the main body first, to then animating the smaller details after. I liked this workflow but there were areas where the body would be animated but the legs are arms cannot reach certain areas, I planned so I would have to adjust the animation of the body. Besides this which is a correction I expected would happen as it happened in the AnimDojo tutorial, I liked the workflow and would apply it to other creature work. The camera movement technique I discovered in this test was something I liked as well and would be looking to apply in other animations that involve camera movement.
Creature Test Polish
From my tutorial, my tutorial highlighted areas I needed to work on such as the weight when the Leopard jumps on the branch, and a turn of the head at the end to show the animation is finished rather than it cutting off, looking like there is more to show. I added these to the animation to have this polished test.
Take Note Environment
From my research into an office and interview environment, I put together a scene with assets from TurboSquid, including three of their assets that’s were rigged by Claire which was a pen, a piece of paper, and a chair. I knew I wanted the office to be brown but have the interviewee in a blue colour to stick out in the environment. The assets that were rigged were in the wrong sizes for the environment so I sent the project to Claire where she could rescale the assets to fit the environment. I parented the pen to the IK control of the interviewee character so the pen can move along with the hand. From this, I had the environment and the colours ready to begin animating.
https://www.turbosquid.com/FullPreview/Index.cfm/ID/955743
https://www.turbosquid.com/FullPreview/Index.cfm/ID/1310395
https://www.turbosquid.com/FullPreview/Index.cfm/ID/1059347
https://www.turbosquid.com/FullPreview/Index.cfm/ID/1128913
https://www.turbosquid.com/FullPreview/Index.cfm/ID/794838
https://www.turbosquid.com/FullPreview/Index.cfm/ID/1185518
https://www.turbosquid.com/FullPreview/Index.cfm/ID/786113


Subtext Animation Test
Following the AnimDojo tutorial I watched on animating subtext and animating with spline tangents, I produced this animation where I worked on both these areas.
I created reference before animating to help me with my posing.
I animated using spline and I found that I did not like the workflow as much as working in stepped. In stepped, I feel that the scene is more organised when animating. However, I can see how animating in spline is useful when animating quickly. Animating in spline is a workflow I would use if the animation I needed to make had a quick turnaround. For my specialism and the companies, I am tailoring my work to, animating in stepped would work better for my animations.
Regarding subtext, I have the audio ready, but I needed to think of new dialogue that would work with the motions and facial expressions I plan to have for the character. I split the dialogue into three sections being the three sentences the character says which is:
“Level 4.”
“I know what you meant.”
“Were waiting.”
I changed the dialogue in my head to match the animation of the character and demonstrate the subtext of the performance. I changed the dialogue to:
“Leave me alone.”
“Can’t you see I’m busy?”
“Make it quick.”
This way, the performance shows that the character is fixated on a game and the second character is only allowed a fraction of the first character time due to this fixation on the game. I sent this animation and the creature test to Daniel Bielawski and his critique highlighted areas such as weight and motion of the characters. For example, the momentum and weight of the Leopard, and the rotations in the body of the subtext character.


Re-Designing the Take Note Story
After my tutorial, I was recommended to send my reference to Daniel Bielawski for his opinion on the story. The Boss character worked well but the interviewee needed some work. The critique I received from this was that the interviewee could knock something over as he is reaching for a pen. The look of the character will need to show he is an underdog in that scene so he recommended that I have him in a lower chair and have the character contrast the boss by being fidgety. From this, I worked on the story and adjusted the weaker areas.


I also spoke with Rebecca Meilak regarding my FMP story and she thought that the story could involve the character spilling ink on the paper and giving it back to the boss. From both viewpoints, I liked the underdog look Daniel Bielawski recommended and I liked an issue with the ink idea from Rebecca Meilak. From this, I re-recorded the reference where the story will be changed to the ink not working in the pen, causing the interviewee to shake it around and drop the pen. The idea of contrast in characters will be an area I have to keep in mind as I need to show the relaxed personality of the boss, and the stressed persona of the interviewee.
Take Note Animation Workflow
Once I had everything in order like the environment, reference and models rigged, I could start my animation process, choosing what workflow I have learnt that could fit the project best. I decided that the workflow I will use will be a combination of the workflows I have investigated. Once the reference is in the scene, I will animate simplified objects like balls and cubes to represent each part of the body, starting from the main body and building up on that simplified object to another such as the shoulders. From this, I can get the timing of the keys as well as the arcs of the motion. Then I will use stepped tangents to work on the key poses, then the breakdowns, then the first pass which will be all the keys I plan to use in the animation in stepped. From there, I can turn the tangents into splined and start to polish the animation.
Chest
Shoulders
Hands
Head
Elbows, Finished Shape Reference
From this, the timing and arcs for the motion of the performance were completed, and I could start applying this animation to the Malcolm rig.
Key poses
Breakdowns
Added Breakdowns
Details
Polish
Video sent to my sound designer to start adding sound to the animation.
Animation with Sound
Second Pass After Receiving Feedback
Rendered Outcome
To create the overlap on the character, I took photos of the time slider with all the keys assigned to each of the shapes that I used as reference. From this, I would add those keys to the Malcolm head control and then set the keys for all the controls for the Malcolm rig. Then I have all the keys set for timing and overlap for the Malcolm rig. This also allowed me to work on all the details before going into spline.


In order to work on the dialogue, I also recorded my face to help me in the dialogue pass.
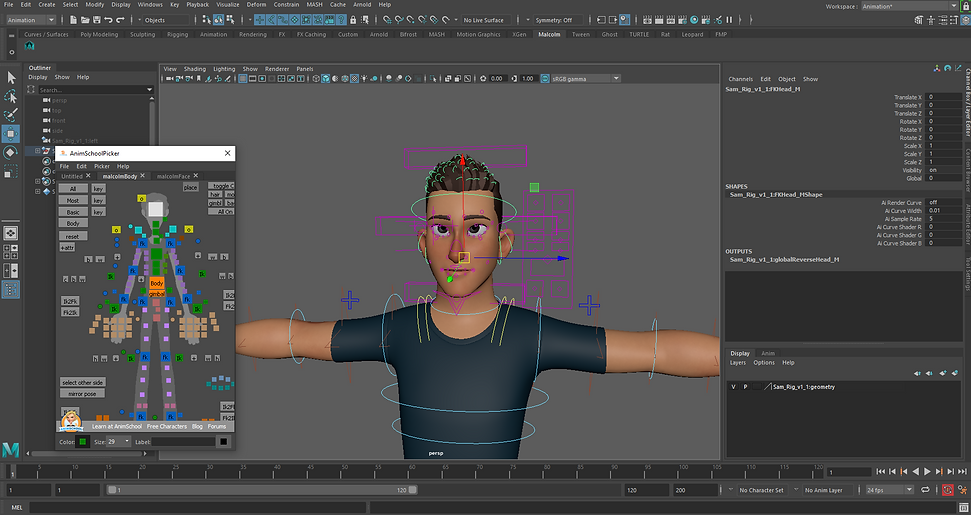
Re-Rigging the AnimSchool Picker
I recently bought a new rig and wanted to have a rig assigned to it. For this, I created some buttons and started to create a very basic rig. I watched a tutorial on how to use the Malcolm rig and it mentioned about adding buttons to the picker if I wanted to. From this, I was able to understand the process of assigning a picker to a character.

I then thought about whether I could use the Malcolm rig picker and assign those buttons to the new characters controls. From this, I found that I could I re-assign the buttons on the AnimSchool Malcolm body and face picker to this new character. I could now start animating with the help of a picker.
Formative Pitch
From my pitch, I was able to share my work and receive critiques on my progress so far. The ‘Take Note’ animation is finished, and it was recommended that I use this as a step onto my next animation which will be the special agent piece. It was highlighted that the ‘Take Note’ animation could be developed further which I may revisit during the third term.


Anim Layers Animation Test
From my research into the workflow of anim layers, I decided to test this workflow by recording reference, animating a short piece using a new rig that I am also testing out, and applying what I have learnt from the tutorial seen in the personal development tab.
Reference
Lighting with Ambiant and Directional Lights
Lighting with Directional Lights
Training Room Script
I designed a script following the layout of the previous script I made for the ‘Take Note’ animation to help the voice-over actor know the emotion and dialogue he will have to read. A student at Ravensbourne called Ben Kelly is helping me as he will be the voice over in this animation. I will direct the dialogue in the voice over recording session I will have with him.


Posing Special Agent Character
I posed the character I plan to use as the special agent in poses that I feel with me like the poses that will appear in the animation. This is a way to test the rig of its capabilities. I recorded reference, found some good poses I made, and used them as reference for these poses.


Cat Test
For this test, I bought a rig from Gumroad by Truong CG Artist.
https://gumroad.com/truongcgartist?sort=page_layout&tags=creature%20rig,maya%20rig
I found reference online that I liked and used that as the reference for the animation.
https://www.youtube.com/watch?v=4atBmbCmBzs
I animated this cat as a realistic creature so I decided not to use the shape reference I normally use in my workflows now.
Training Room Animation Workflow
For this animation, I am following similar workflows that I learnt during the FMP. I started by recording my reference. I recorded the reference with the help of playing the audio during the recording of the reference. I then cut the clips together and put the final audio over the video. From this, I applied my workflow to produce this animation.
Reference
Shape Reference
Key Poses
Breakdowns
Blocking
WIP
Polish
From the tutorial I watched on lighting by Sir Wade Neistadt, I added some lighting for the performance to be seen a bit clearer.
Second Pass After Receiving Feedback
I decided not to render the ‘Training Room’ animation as the shadow of the gorilla would give away the size of the creature before he is introduced, as well as other issues such as parts of the model not being attached to the character once I saw it in the render view. Fixing these issues would mean I would have to spend a lot of my time working on the render whereas I could put that time into my specialism and other crucial areas in the project.
Wolf Test
From this test, I found reference and made this short test to experiment with creature animation and to strengthen my creature work. I found the rig from Gumroad by Truong CG Artist, by clicking the Maya Rig button which took me to a list of characters I could use to animate. I wanted to add to my creature animation work by working on a Wolf rig. I enjoyed using this rig as I worked better with its controls than previous rigs I have used of other creatures.
https://gumroad.com/truongcgartist?sort=page_layout&tags=maya%20rig
https://www.youtube.com/watch?v=hHeOopprd9I
From my Leopard test where I applied the reference over the camera so I could track the motion of the reference in Maya, I applied the same workflow to this animation. The reference would follow the camera by a parent constraint, and I could start working on the creature character.
Bird Test
Like the wolf test, I found reference and used a rig from Gumroad by Truong CG Artist, when clicking on the Maya Rig button to find what rigs I could use. I also found a Low Poly tree that could be used for the bird to rest on, on TurboSquid.
The reference itself had the bird coming in from an opposite angle from what I wanted im my animation so I found a way to flip the video in Premiere Pro from the help of a website showing how it can be done.
https://adobemasters.net/how-to-flip-a-video-in-adobe-premiere-pro-cc-2020/
https://gumroad.com/truongcgartist?sort=page_layout&tags=maya%20rig
https://www.turbosquid.com/3d-models/free-tree-3d-model/592617
Jada’s Robot Animation
For the two animations I made for her, I asked several questions to help me understand what I needed to do for the animation. When animating, I needed to copy and paste the values of one arm to another and researched a code that can automatically flip the tangents. I sent playblasts to show my animations to which she was happy with once I fixed the hovering which she commented on.


Video Breakdown
I collected all my animations as well as images that I felt should be included in the video breakdown. I used Premiere Pro to make this video and due to the way I have structured my work and exported my animations, I was able to build the video breakdown and complete it quicker than I anticipated.

Report Production
I made the report on Photoshop by rendering images of animations I made in this project for the background, added images from my work to support my writing, and wrote the content on Word. Below is each rendered image I used for the background of the pages of the report.


Showreel
I collected the pieces I felt should be included in my showreel as well as some reference that I also felt was beneficial to include in my showreel. Below is my finished showreel.